
Vinyl looks slick on walls until it starts babysitting a damp science project you never signed up for. If your space smells musty, seams are bubbling, or baseboards keep staining for no apparent reason, you might be dealing with vinyl wallpaper mold hiding behind that glossy finish. The good news is you can spot it with no-drill checks, remove it without turning your room into a snow globe of spores, and fix the airflow and humidity that fed it in the first place. Here’s how to catch it early, clean it safely, and keep it from coming back.
Why Vinyl Wallpaper Traps Moisture
Vinyl and foil wallpapers are low-perm, which means water vapor basically hits a stop sign when it gets to the wall surface. In building science terms, they act like Class I vapor retarders. That shiny wall finish slows drying to a crawl, so any moisture that sneaks into the wall assembly tends to hang out right behind the paper. In warm-humid conditions, the wall face can dip below the dew point while the room air is trying to cool the place down. The result is predictable: condensation behind the vinyl and a hidden buffet for mold.
Exterior walls, bathrooms, kitchens, and any room where a cold interior surface meets steamy air are usual suspects. In these spots, wall temperature can lag and humidity spikes constantly. Mold loves the paper backing on drywall, wallpaper adhesive, and even dust. Common indoor molds like Penicillium and Aspergillus can happily colonize those layers, and their spores can aggravate asthma and allergies while the growth stays mostly out of sight. If you want a quick primer on the usual troublemakers, see the Types of Mold guide from Best Option Restoration at boraustin.com/types-of-mold/.
Hidden growth often starts small, then ramps up after seasonal swings, heavy rain, or a cooling system that short-cycles. Since vinyl slows evaporation, brief moisture events turn into long, mold-friendly wet times. That’s why you need detection methods that do not turn your wall into Swiss cheese.
Signs You Might Have A Hidden Problem
You don’t need night-vision goggles to catch vinyl wallpaper mold early. You just need to know what it likes to advertise.
Start with your nose. A musty odor that intensifies after showers, during AC cycles, or after rain is a classic tipoff. Next, look for rippled seams, curling edges, tiny blisters, or discoloration where the wall meets the baseboard or crown. If window panes drip regularly and the thermostat is set to arctic, your interior humidity is likely riding high too. In rooms with exterior-facing walls done in vinyl or foil paper, those symptoms deserve a serious look.
No-Drill Checks That Work
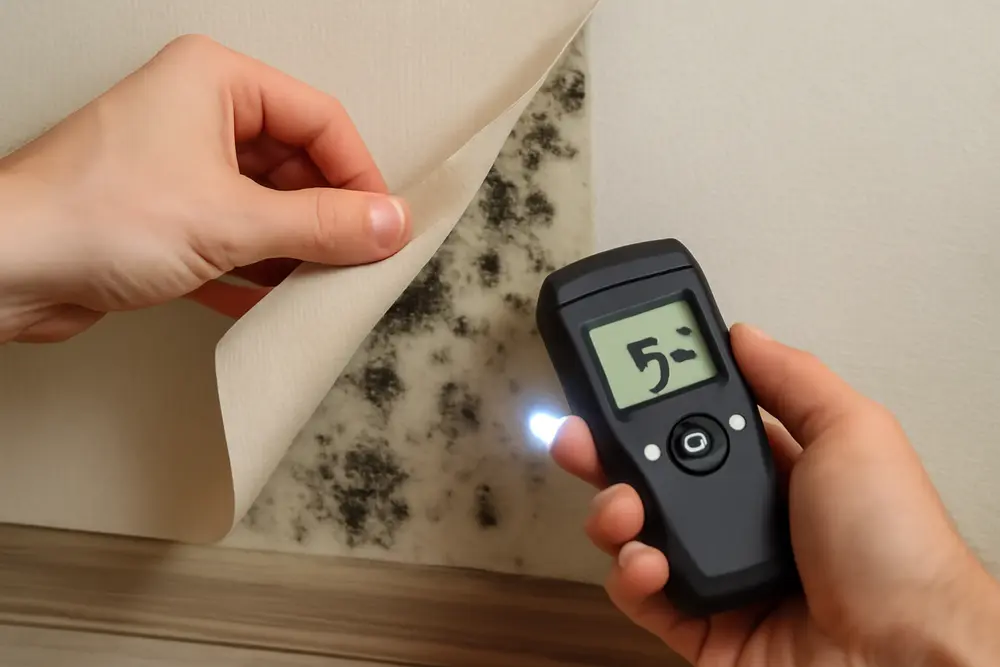
You can confirm moisture behind vinyl without carving up your wall. Noninvasive moisture detection is your friend here. With the right tools and a few careful checks, you can build a pretty solid case before you ever reach for a scraper.
Tools That Tell The Truth
| Tool | What It Tells You | How To Use It |
|---|---|---|
| Capacitance Moisture Meter | Relative moisture in drywall or plaster without puncturing | Scan a known-dry interior wall to set a baseline, then compare suspect areas. Elevated readings over seams or exterior walls are a flag. |
| Infrared Camera | Surface temperature patterns that hint at hidden moisture | Look for cold anomalies that line up with exterior walls, corners, or plumbing runs. Cold plus high RH is a condensation magnet. |
| Hygrometer | Room relative humidity | Track RH over a week. If it rides above about 60 percent for long stretches, that’s mold-fuel territory. |
| Laser Thermometer | Surface temperature of the wall | Compare wall surface temp to the room’s dew point. If wall temp is below dew point, condensation is likely forming behind the vinyl. |
Combined readings are powerful: an IR cold spot where a capacitance meter spikes and the room sits at 65 percent RH is not a coincidence. For more on moisture mapping basics, see this overview of noninvasive methods at waterdamage-jamestown.com.
Dew Point Reality Check
Humidity is not just a vibe, it is a math problem. When the dew point is above your wall surface temperature, moisture will condense. Grab a hygrometer and note the room’s temperature and RH. Use a dew point calculator or app to get the dew point. Then shoot the wall surface with a laser thermometer. If the wall reads cooler than the dew point, there is a good chance condensation is forming behind non-breathable wallpaper. That is why noninvasive moisture detection pairs readings instead of trusting a single gadget.
Seam Peek, Not Wall Demo
Still unsure? Do a tiny exploratory check at a seam or behind a switch plate without going full renovation. Wear an N95, eye protection, and gloves. Loosen a half-inch of seam at a discrete spot to see the backing and drywall face. If you spot gray, green, or black staining on backing or adhesive, or the drywall paper feels soft, you have confirmation. If all you see is clean backing and no odor amplifies, re-adhere and keep monitoring. You can find a good walk-through of low-disturbance checks and safety basics at allnationrestoration.com.
Safe Removal Without Spreading Spores
Once you confirm vinyl wallpaper mold, your job is to get it out without launching spores into the HVAC or grinding them into dust. Containment and damp methods are the name of the game. If anyone in the home has asthma, severe allergies, is pregnant, or immunocompromised, skip DIY and bring in a pro team.
Set The Stage For Containment
Suit up with an N95 or better respirator, tight-fitting goggles, and nitrile gloves. Kill air movement that might distribute spores to the rest of the house. Turn off the HVAC serving that room or close supply and return registers and tape them off. Close doors and tape plastic sheeting over openings. If you can, create negative pressure by exhausting a window fan to the exterior so air flows into the room from clean areas and out the window. Cover floors with poly sheeting to catch adhesive goo and debris. If this is more than a single wall or a small bathroom, professionals will scale this up with dedicated negative air machines and HEPA filtration.
Damp Removal Beats Dust
Lightly mist the wallpaper surface with water before you peel to reduce dust. Score the vinyl to help the moisture reach the adhesive, then peel slowly and roll sections inward so the contaminated face stays tucked. Avoid snapping the sheet mid-air. Keep sections reasonably sized so they are easy to bag while still damp. If the paper backing remains stuck to the drywall, use warm water with a small amount of dish detergent or a wallpaper removal solution and gently scrape, keeping the material damp as it lifts.
Do not dry-sand or wire-brush contaminated backing. That is a fast way to aerosolize spores. As you open the wall surface, check the drywall paper. If it is soft, delaminating, or visibly colonized, cut out the impacted section to clean, solid material. Small, localized drywall replacement now beats recurring growth later.
Cleaning The Substrate
HEPA vacuum hard surfaces to remove loose particulate. Then wash non-porous or semi-porous surfaces with a mild detergent and water. On finished wood, tile, metal, and plastic, a detergent wipe followed by a clean water rinse is typically adequate. On raw drywall paper or other porous materials that have visible growth, removal is the right answer instead of topical cleaning. Bleach is not recommended on porous building materials since it will not penetrate deeply and can leave excess moisture behind. The goal is simple: remove mold, do not perfume it.
Bag It Like You Mean It
While materials are still damp, double-bag them in 6-mil poly bags and seal tightly. Wipe the outside of the bags while they are still in containment. Carry them out along the planned path to the exterior to keep the rest of the house clean. Follow local disposal guidance for construction debris. After removal, keep running your negative pressure or a HEPA air scrubber while you dry the space.
Drying Targets And Quick Checks
Dry the area quickly. Mold growth can restart in as little as 24 to 48 hours if materials stay wet. Use dehumidifiers and targeted air movement to drop room RH to the 30 to 50 percent range while keeping airflow across cleaned surfaces. Be careful with aggressive fans pointed directly at wet drywall paper if you did not remove it, since that can lift fibers. Use your capacitance moisture meter to compare the cleaned area to a known-dry reference wall. If the suspect wall continues to read higher than the interior reference after 48 to 72 hours, you probably still have a source of moisture that needs attention.
Before you rebuild, look for recurring causes such as a cold exterior wall with spotty insulation, a bathroom with no real exhaust, or an AC system that is oversized and short-cycles. Rebuilding over a wet, cold, and stagnant wall is just installing a new incubator.
Fix The Source So It Stays Fixed
Prevention lives in three buckets: humidity control, smarter airflow, and better wall assemblies. Get these right and you cut off the food supply that made vinyl wallpaper mold in the first place.
Control Humidity
Keep indoor RH between 30 and 50 percent. In warm-humid months, that often means running a stand-alone dehumidifier or using HVAC settings that prioritize dehumidification instead of nonstop cooling blasts. If your AC is oversized, it will cool fast and shut off before pulling much moisture from the air. If you cannot change the system, dehumidifiers pick up the slack. In bathrooms and kitchens, exhaust fans should vent outdoors, not into an attic or soffit. Run them during use and for 20 to 30 minutes afterward. Put them on a timer so they actually do their job.
Improve Insulation And Air Sealing
Exterior-facing walls behind vinyl wallpaper are prime candidates for condensation when insulation is weak or air leaks are sneaking behind the finish. Add or improve insulation, seal rim joists and penetrations, and address thermal bridges where studs, headers, or corners stay cold while everything else warms up. The more even your wall temperatures, the less likely you are to hit dew point behind that low-perm layer. For a plain-English explanation of why vinyl traps moisture and how dew point plays into it, see this warning at howardenvironmental.com.
Choose Breathable Finishes
If you love the look of wallpaper, pick breathable options and adhesives with higher perm ratings. Skip vinyl or foil papers on exterior walls and inside bathrooms or laundry rooms in humid climates. High-quality latex paints with moisture-permeable primers are a safer pairing with imperfect real-world walls. If you need a wipeable finish, pair satin or semi-gloss paint with humidity control rather than relying on a plastic-like wallpaper skin to do all the work.
When To Call Best Option Restoration
DIY is fine when the affected area is small and the cause is simple. Bring in Best Option Restoration of Travis County when any of these are true:
You see growth larger than about 10 square feet, the odor is strong across multiple rooms, materials are soft or crumbling, or the wall gets wet again after you dry it. Call if anyone in the home has asthma, severe allergies, is pregnant, or immunocompromised. If there was a prior leak, roof issue, window failure, or plumbing run behind that wall, you want trained eyes on the source. Commercial or multifamily properties should not swing at this without professional containment and documentation.
Our crews use noninvasive moisture detection tools like capacitance meters, infrared cameras, particle counters, and borescopes inserted through existing openings to pinpoint hidden moisture with minimal over-removal. We set up proper containment, remove contaminated materials safely, clean with HEPA filtration, and fix the moisture source so you are not playing mold whack-a-mole next season. Learn about our mold process at boraustin.com/mold-clean-up-services/, and see how we reduce waste and use precise measurement tools at boraustin.com/eco-friendly-disaster-recovery-practices/.
Quick Action Checklist
- Sniff and scan. Musty smell, seam bubbles, and cool exterior walls point to hidden issues.
- Use noninvasive moisture detection. Pair a capacitance meter with an IR camera and a hygrometer.
- Compare wall temperature to dew point. If wall temp is lower, you have a condensation risk.
- Do a tiny seam peek with PPE if you need visual confirmation.
- Contain, mist, and remove slowly. Bag materials damp and double-bag them.
- HEPA vacuum, detergent clean, and dry to 30 to 50 percent RH.
- Fix the source. Upgrade ventilation, insulation, and choose breathable finishes.
- Call Best Option Restoration of Travis County if the area is large, recurring, or health risks are present.
FAQ: Vinyl Wallpaper Mold
Can I Just Bleach The Wallpaper?
No. Bleach does not penetrate porous materials and it adds moisture. On vinyl, you are just cleaning a surface while the mold party continues behind it. Removal and drying beat perfume and wishful thinking.
How Dangerous Is Vinyl Wallpaper Mold?
Hidden mold behind vinyl can aggravate asthma and allergies and can spread unnoticed because the covering slows drying. Common indoor molds like Aspergillus and Penicillium thrive on paper backings and adhesives. If you have vulnerable occupants or widespread growth, bring in a professional team.
Will An Air Purifier Fix It?
HEPA purifiers reduce airborne spores, which helps during cleanup and for general air quality, but they do not remove growth in the wall cavity or behind wallpaper. You still need to remove contaminated materials and control moisture.
Do I Need To Remove All The Drywall?
Not usually. If mold is limited to the wallpaper backing and the drywall paper is clean and intact, careful removal and cleaning can work. If the drywall paper is soft, delaminated, or visibly moldy, remove back to clean, solid material. Over-removal is wasteful, but leaving contaminated drywall guarantees a comeback.
What Humidity Should I Keep Indoors?
Target 30 to 50 percent RH. If your space hangs above 60 percent for long stretches, expect condensation and mold to follow. Use dehumidifiers and run real exhaust fans that vent outdoors to keep humidity in the safe zone.
Can I Paint Over Mold With A Mold-Killing Primer?
Paint is not a mold removal tool. Some primers resist future growth on the film, but they do not fix existing contamination or the moisture problem. Clean or remove affected materials first, then prime and paint once the wall is clean and dry.
How Do Pros Test Without Drilling?
We combine noninvasive moisture detection tools like capacitance moisture meters, infrared thermography, hygrometers, and targeted borescopes through existing openings like outlet boxes. That gives a clear picture of hidden moisture with minimal disruption.
Pro Tips That Save You A Second Round
Set bathroom fans on timers so they actually run. Undercut bathroom doors so fans can pull enough make-up air. If a wall keeps showing cold spots on an IR camera, check for missing insulation at corners, headers, and behind tubs. If your AC cools the house in five minutes and shuts off, it is probably too big and not dehumidifying well. When in doubt, skip vinyl or foil wallpaper on exterior walls and wet rooms, and pick breathable wallpapers or paint systems instead. That glossy catalog look is not worth a hidden mold farm.
If you are staring at suspicious seams or your meter just lit up like a Christmas tree, start with no-drill checks, then call Best Option Restoration if the signs say it is more than a tiny patch. We are ready to track moisture to its source, remove contamination safely, and rebuild smarter so the wall stays as clean as it looks.